

Custom stickers are one of the most affordable, creative, and effective tools for self-expression, branding, and marketing. Whether you’re selling them online, using them as part of your
packaging, or handing them out at events, your sticker design can make or break its appeal.
If you’re wondering how to make custom stickers that actually sell, you’re in the right place. At Unique Print, we’ve printed thousands of custom stickers for artists, small business owners, and major brands—and we know what works. Here are our top design tips to help your stickers stand out.
1. Start your Custom Sticker Project with a Clear Purpose
Before you jump into colors and fonts, ask yourself:
- What is this sticker for?
- Who is it meant to appeal to?
- Where will it be used?
Designing a sticker for laptop decoration is very different from creating a product label or a kids’ reward sticker. Knowing your audience helps you tailor your design for maximum impact.
2. Keep your stickers Bold and Simple
Tiny details can get lost—especially when your sticker is small. Stickers that sell tend to have:
- Bold lines and high contrast
- Minimal text
- Recognizable shapes or symbols
A clean design reads better from a distance and pops in photos, which is especially important if you’re selling online.
3. Choose Colors Strategically
Color evokes emotion and attracts attention. Consider:
- Bright, contrasting colors for fun and vibrant stickers
- Earth tones or neutrals for a more minimalist or eco-friendly vibe
- Brand colors if you’re designing for a business
Make sure your color palette works well in both digital and printed formats. We recommend using CMYK color mode for the best print accuracy.
4. Use High-Quality Graphics and Text
Stickers are printed at relatively small sizes, so quality matters.
- Use vector graphics whenever possible for sharp lines.
- Set your resolution to at least 300 DPI.
- Keep fonts legible—avoid super thin or elaborate script fonts unless they’re big enough to read easily.
If you’re not sure your file is ready for print, our team can double-check it for you.
5. Experiment With Shape and Cut Style
Your sticker doesn’t have to be a boring circle or square! Some popular cut styles include:
- Die-cut: follows the shape of your design
- Kiss-cut: easy-peel stickers within a square or rectangle backing
- Sticker sheets: multiple designs on one sheet, great for collections or themed sets
Unique shapes instantly grab attention and give your sticker a custom look.
6. Add a Finishing Touch
Want your sticker to feel premium? Consider finishing options like:
- Glossy or matte laminate
- Holographic or glitter effects
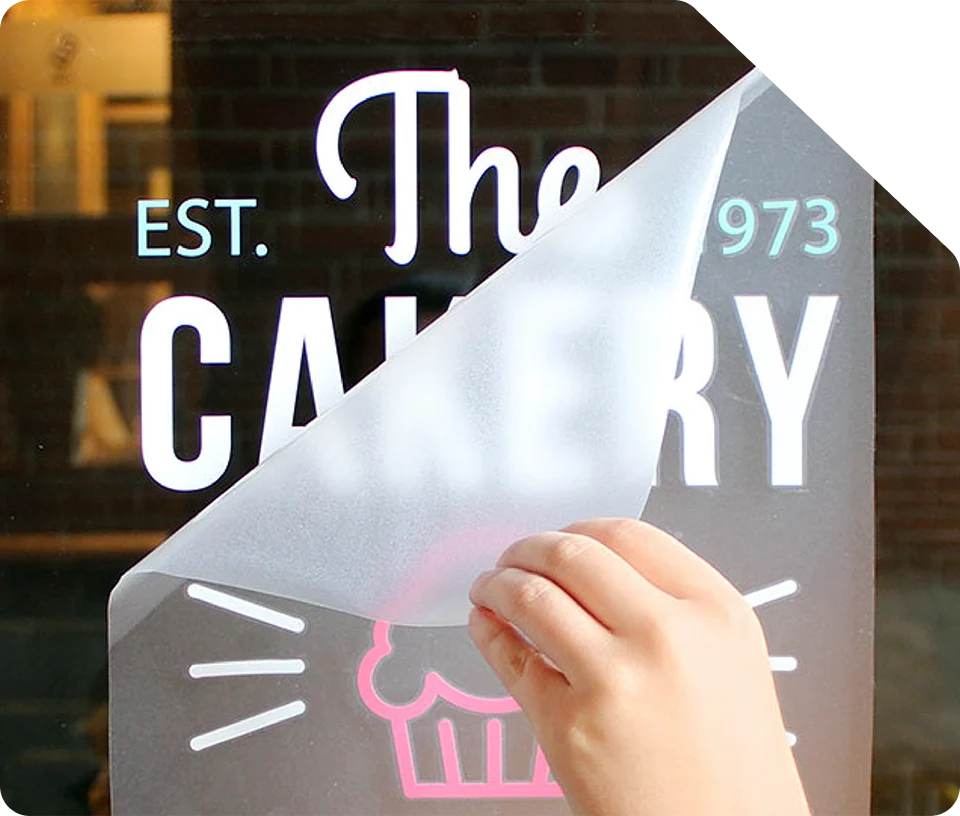
- Clear vinyl for see-through backgrounds
These small upgrades can make your stickers more desirable and help justify a higher price point.
7. Test Before You Launch
Before printing hundreds of stickers, try a small batch to test your design. Share samples with friends, post mockups on social media, and get feedback. You might be surprised at which designs people respond to the most!
Ready to Print Your Custom Stickers?
At Unique Print, we offer high-quality custom sticker printing with fast turnaround times and expert guidance. Whether you’re printing your first sticker sheet or ordering bulk custom stickers for your brand, we’re here to help you every step of the way.
Need help with sticker design or file setup? Contact us anytime—we love bringing your ideas to life
Your Special Day: A helpful wedding print checklist to keep you organized
Planning for a wedding can seem like a daunting task. It starts with thinking about venues, guests to invite, time of year, all the way up to the actual wedding day with catering, place-setting, music, and more. All along the way, partnering with the right people can help make your special day unforgettable down to the last detail. A great print shop can you help you right from the start, with stationery for your invites, reception, and ceremony and elevate your big day. Unique Print is here to help you walk through all of the things you might need to consider when planning for your wedding with a helpful wedding print checklist below.
1. Pre-Planning and Inspiration
Define Your Wedding Vision:
- Choose your wedding theme (classic, modern, vintage, rustic, etc.).
- Select your color palette and overall style.
Gather Inspiration:
- Create mood boards using Pinterest, wedding magazines, or online galleries.
- Save examples of designs, textures, and layouts you love.
2. Create Your Stationery Inventory
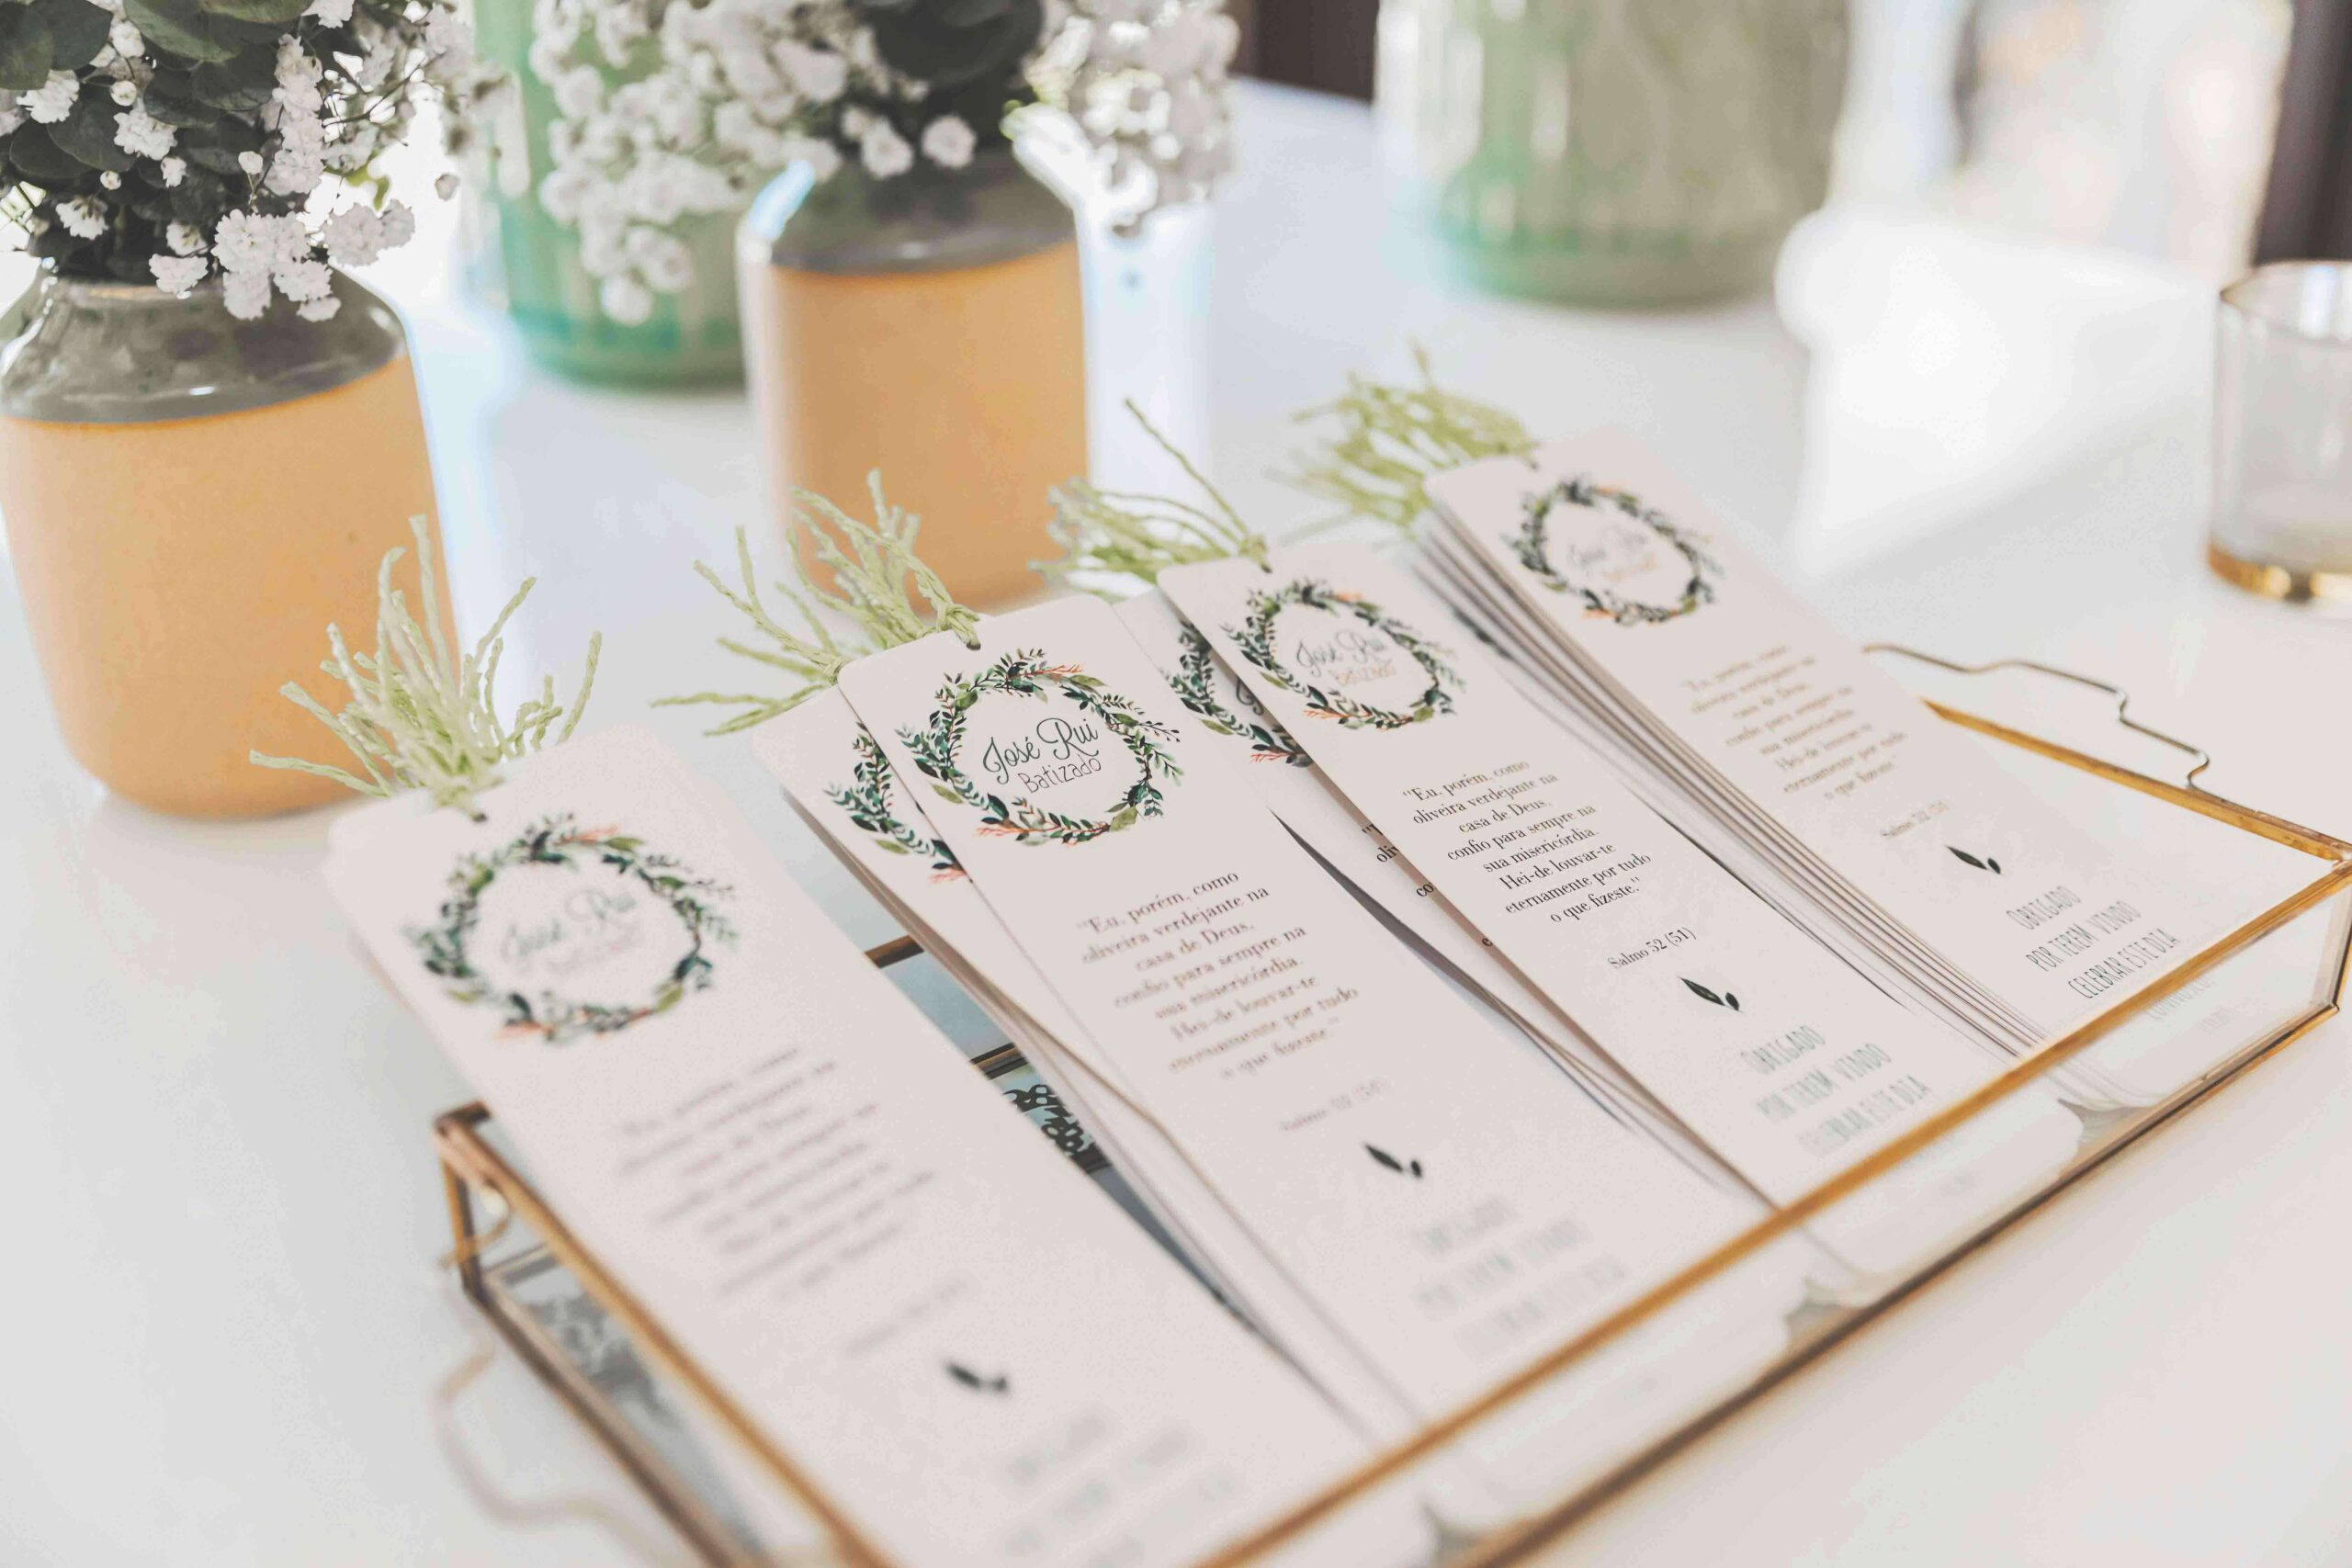
Essential Invitations & Announcements
-
Wedding Invitations:
- Choose high-quality paper stock (luxurious cardstock, textured, recycled options).
- Consider special finishes like foil stamping, embossing, or letterpress.
- Select matching envelopes and addressing options.
-
Save the Date Cards:
- Coordinate the design with your invitations.
- Choose a format (traditional card, postcard, or even a magnet).
- Add personal touches such as engagement photos or custom illustrations.
-
RSVP Cards & Additional Inserts:
- Include RSVP cards with options for meal selection or special requests.
- Add additional detail cards (directions, dress code, wedding website URL).
3. Ceremony and Reception Stationery
For Your Ceremony
- Wedding Programs:
- Outline the order of the ceremony and any special readings or music.
- Decide on a layout (bi-fold, single-page, booklet) and include custom artwork.
- Custom Signage:
- Order welcome signs to greet guests.
- Include directional or seating signs to guide attendees.
For Your Reception
- Menus:
- Design menus that match your wedding’s theme and color scheme.
- Choose formats that can double as keepsakes.
- Place Cards & Seating Charts:
- Create personalized place cards and table numbers.
- Design seating charts that are both functional and stylish.
- Additional Reception Extras:
- Consider printing custom banners or backdrops for photo booths or the head table.
- Add unique touches like table tents or napkin holders with your design
4. Bridal Shower Stationery
A bridal shower is a special celebration before the wedding, and the right print materials can set the tone for a fun and memorable event.
- Bridal Shower Invitations:
- Create invitations that reflect the personality of the bride and the theme of the shower.
- Consider playful or elegant designs that complement your overall wedding stationery.
- Choose paper and finishes that make your invitation stand out.
- Save the Date Cards (Optional):
- For larger bridal shower events, a save the date can help guests plan ahead.
- Coordinate these with your bridal shower invitation design.
- Bridal Shower Programs or Itinerary Cards:
- Provide guests with an overview of the event’s schedule.
- Include details for games, activities, or any special surprises planned.
- Additional Shower Extras:
- Custom signage to welcome guests and direct them to different activity areas.
- Personalized thank-you cards to send after the event, matching the bridal shower theme.
- Fun elements like favor tags or small printed game instructions to engage guests.
5. Keepsakes and Extras
- Guest Books & Memory Keepsakes:
- Choose between traditional guest books or creative alternatives (scrapbooks, puzzles).
- Consider custom keepsake boxes for storing mementos and photos.
- Thank-You Cards:
- Design thank-you cards that coordinate with your wedding stationery.
- Personalize messages to express gratitude to your guests.
- Additional Extras:
- Order custom stickers, seals, or envelope liners for added detail.
- Explore printing options for accessories like favor tags or coasters
6. Design and Customization Process
- Consultation:
- Schedule a design consultation with your printing shop.
- Discuss themes, paper options, fonts, and any custom artwork.
- Proofing:
- Request digital or physical proofs for each item.
- Review all details for accuracy (spelling, dates, venue addresses).
- Revisions:
- Gather feedback from your partner, family, or wedding planner.
- Finalize adjustments before confirming your order.
7. Planning and Timeline
- Set Your Timeline:
- Begin planning and ordering your stationery 8–12 months before the wedding.
- Allocate time for design consultations, revisions, and final approvals.
- Finalize Orders:
- Confirm production deadlines and delivery dates.
- Factor in extra time for potential rush orders or unforeseen delays.
8. Budgeting and Vendor Coordination
- Budget:
- Establish a budget for your stationery and printing needs.
- Compare vendors and ask for samples to ensure quality and value.
- Communication:
- Maintain regular contact with your printing shop.
- Confirm order details, delivery timelines, and any special requests.
9. Post-Order Checks
- Final Review:
- Inspect the delivered products for quality and accuracy.
- Keep extra copies for last-minute guest additions or emergencies.
- Celebrate:
- Enjoy the process of seeing your wedding vision come to life in print!
- Share your beautiful stationery with friends and family.
By following this comprehensive checklist, you’ll ensure that every piece of your wedding and bridal shower print products—from invitations to thank-you cards—is thoughtfully designed and perfectly executed, making your special day even more memorable. Happy planning!
Consulting with an experienced print company like Unique Print can help you make the right choice for your catalog printing project but you can also get started by thinking about the options below!
1. Catalog Size and Layout
Catalogs come in various sizes, but standard dimensions like 8.5” x 11” and 5.5” x 8.5” are the most common. Depending on your needs, you can also opt for custom sizes that suit your specific product offerings. The layout should be clean, organized, and easy to navigate. Design your catalog with categories, product groupings, and clear sections so readers can easily find what they’re looking for.
Some tips for effective layout:
-
Use consistent fonts and color schemes to create a cohesive look.
-
High-quality images: Make sure product images are sharp and clear to highlight details.
-
Callouts for special offers: Use attention-grabbing text for promotions or discounts.
2. Paper Options and Finishes
Paper quality plays a crucial role in how your catalog is perceived. You want a balance between durability and affordability. Popular paper options include:
-
Glossy Paper: Ideal for vibrant images and an upscale feel. Glossy catalogs are perfect for industries like fashion or high-end retail.
-
Matte Paper: Offers a more subtle and sophisticated look, reducing glare and making text easier to read. It works well for corporate or educational catalogs.
-
Cover Stock vs. Interior Stock: For the cover, a thicker and more durable stock should be used to give a premium, sturdy feel. Interior pages typically use a lighter stock to maintain flexibility.
Different paper coatings can also enhance the look and feel of your catalog:
-
UV Coating: Adds a glossy, high-shine finish to protect the pages and make colors pop.
-
Soft Touch Coating: Provides a smooth, velvety texture that exudes luxury.
3. Binding Methods
The binding method for your catalog influences both durability and cost. Choose a method based on the number of pages and the overall look you’re going for:
-
Saddle-Stitch Binding: Most suitable for catalogs with a smaller page count (typically fewer than 64 pages). Saddle-stitching involves folding sheets in half and stapling them along the spine, creating a simple and cost-effective booklet.
-
Perfect Binding: Ideal for thicker catalogs, perfect binding uses adhesive to glue the pages to a square spine. This method gives a professional, polished look, similar to a paperback book.
-
1. Catalog Size and Layout
Catalogs come in various sizes, but standard dimensions like 8.5” x 11” and 5.5” x 8.5” are the most common. Depending on your needs, you can also opt for custom sizes that suit your specific product offerings. The layout should be clean, organized, and easy to navigate. Design your catalog with categories, product groupings, and clear sections so readers can easily find what they’re looking for.
Some tips for effective layout:
-
Use consistent fonts and color schemes to create a cohesive look.
-
High-quality images: Make sure product images are sharp and clear to highlight details.
-
Callouts for special offers: Use attention-grabbing text for promotions or discounts.
2. Paper Options and Finishes
Paper quality plays a crucial role in how your catalog is perceived. You want a balance between durability and affordability. Popular paper options include:
-
Glossy Paper: Ideal for vibrant images and an upscale feel. Glossy catalogs are perfect for industries like fashion or high-end retail.
-
Matte Paper: Offers a more subtle and sophisticated look, reducing glare and making text easier to read. It works well for corporate or educational catalogs.
-
Cover Stock vs. Interior Stock: For the cover, a thicker and more durable stock should be used to give a premium, sturdy feel. Interior pages typically use a lighter stock to maintain flexibility.
Different paper coatings can also enhance the look and feel of your catalog:
-
UV Coating: Adds a glossy, high-shine finish to protect the pages and make colors pop.
-
Soft Touch Coating: Provides a smooth, velvety texture that exudes luxury.
3. Binding Methods
The binding method for your catalog influences both durability and cost. Choose a method based on the number of pages and the overall look you’re going for:
-
Saddle-Stitch Binding: Most suitable for catalogs with a smaller page count (typically fewer than 64 pages). Saddle-stitching involves folding sheets in half and stapling them along the spine, creating a simple and cost-effective booklet.
-
Perfect Binding: Ideal for thicker catalogs, perfect binding uses adhesive to glue the pages to a square spine. This method gives a professional, polished look, similar to a paperback book.
-
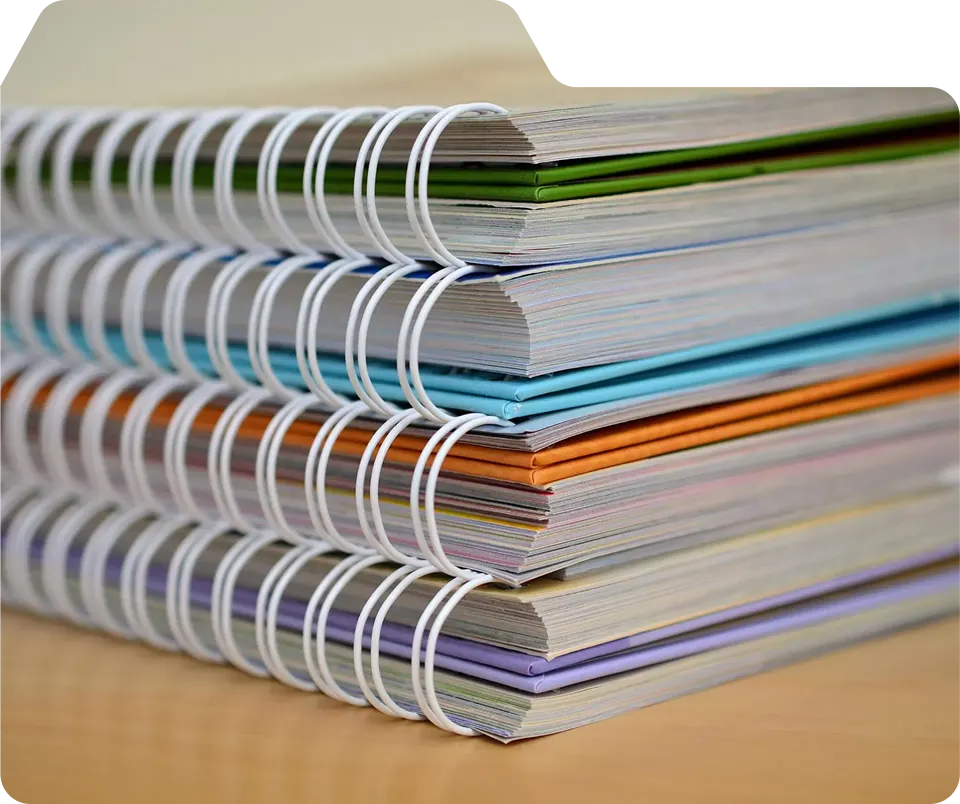
Spiral or Wire-O Binding: These methods are less common but offer functionality by allowing the catalog to lay flat when open. This binding type is excellent for catalogs that need to be handled frequently, such as industrial product guides or manuals.
4. Customizations
Adding custom features can elevate your catalog and make it stand out in a competitive market. Consider incorporating:
-
Foil Stamping: Adds a metallic effect to certain areas, like your logo or key headlines, giving your catalog an upscale, luxurious finish.
-
Embossing/Debossing: Use embossing to raise specific elements of the design, like logos or titles, or debossing to create recessed areas for a tactile effect.
-
Spot UV: This involves applying a glossy varnish to targeted areas (like the cover), making those elements shine and stand out from the rest.
Why Catalog Printing is Essential for Businesses
For many industries, catalog printing is more than just a marketing tool—it’s a crucial element in generating leads, driving sales, and maintaining customer loyalty. Here are a few reasons why catalog printing services are essential for businesses:
-
Comprehensive Product Display: Unlike flyers or brochures, catalogs allow you to showcase an extensive range of products or services, offering detailed descriptions and specifications to help customers make informed decisions.
-
Tangibility: Physical catalogs provide a tangible experience that digital ads and online stores can’t replicate. Customers can flip through pages, mark items of interest, and revisit the catalog whenever they need.
-
Increased Engagement: Studies show that people spend more time engaging with printed materials like catalogs compared to digital content. A well-designed catalog encourages readers to linger, browse, and explore, increasing the likelihood of purchase.
-
Brand Identity: Custom-designed catalogs reinforce your brand’s identity by incorporating your color scheme, fonts, and imagery. This ensures a cohesive message across all your marketing materials.
Optimizing Your Catalog for SEO
While physical catalogs don’t directly affect your online SEO, creating a digital version or embedding product catalogs on your website can significantly boost your search engine ranking. Here’s how to optimize your catalog for SEO:
-
Product Descriptions: Use clear, keyword-rich product descriptions that include essential details and specifications. This not only helps your customers but also improves search engine visibility.
-
Meta Tags: If you’re hosting your catalog online, include optimized meta titles, descriptions, and alt text for all images.
-
Internal Links: Use your catalog to drive traffic back to your website. Include QR codes or URLs that link directly to specific product pages.
Top SEO keywords for catalog printing include:
-
Custom catalog printing
-
Catalog printing services
-
High-quality catalog printing
-
Perfect bound catalogs
-
Saddle-stitched catalogs
How to Prepare Your Files for Catalog Printing
Ensuring your design files are print-ready is crucial for producing high-quality catalogs. Here’s a checklist to guide you through the process:
-
File Format: PDF is the preferred format for print, as it maintains design integrity and preserves high resolution.
-
Bleed and Margins: Include a bleed of at least 0.125” to ensure that images and designs extend to the edge of the page without leaving white borders.
-
Resolution: All images should be at least 300 DPI for clear, crisp printing. Lower resolutions can result in blurry or pixelated images.
-
CMYK Color Mode: Print designs should always be in CMYK color mode to ensure accurate color reproduction.
-
Proofing: Always request a proof to review colors, layout, and text placement before the final print run.
Choosing the Right Print Shop for Your Catalog
Selecting the right print shop for your catalog project is essential to getting the best results. Here are some key considerations:
-
Quality: Always ask to see samples of previous work to assess the print quality and finish options.
-
Turnaround Time: If you’re working on a tight deadline, ensure the print shop can deliver on time without compromising quality.
-
Customer Service: A good print shop should offer personalized service, including assistance with file preparation, proofs, and custom features.
Final Thoughts on Catalog Printing
Catalog printing services are a vital tool for businesses across various industries, from retail and real estate to education and nonprofits. Whether you’re looking to create a small product booklet or an extensive annual report, a well-crafted catalog can help you effectively engage your audience, present your offerings, and reinforce your brand’s identity.
Looking for catalog printing services in NYC? Contact us at Unique Print NY to discuss your project and see how we can help you create a high-quality, customized catalog that meets your business needs.
-
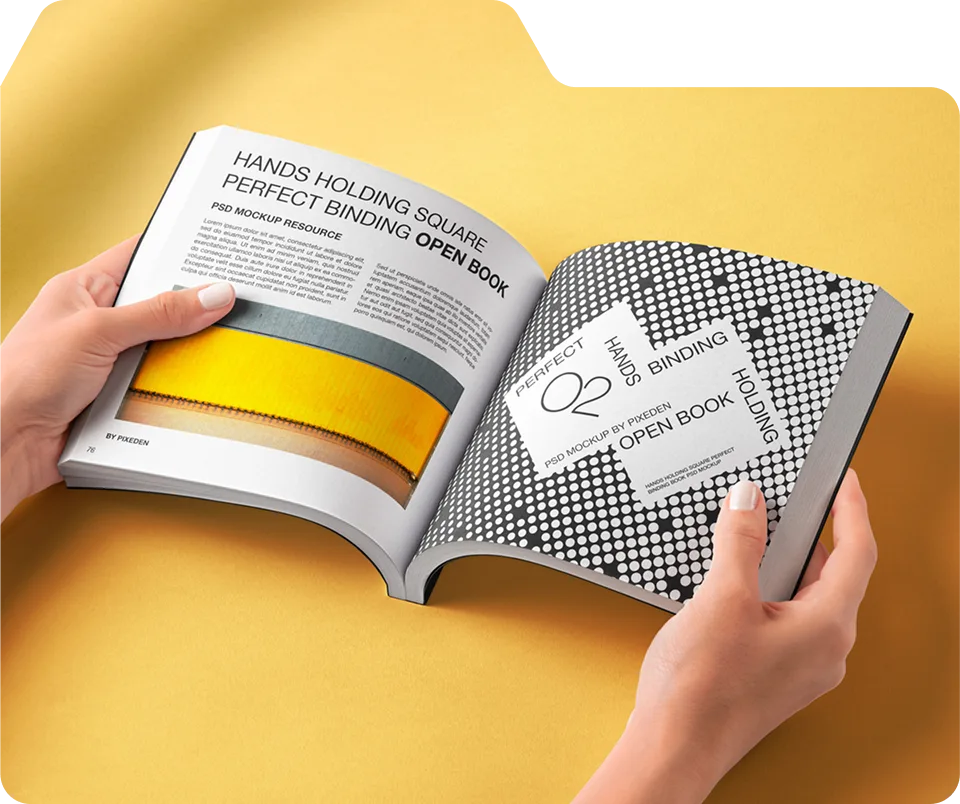
When it comes to catalog printing, one of the most important decisions you’ll make is choosing the right binding method. Two of the most popular options are saddle-stitched and perfect-bound catalogs. Each has its own unique benefits and is suited for different types of projects, depending on factors like page count, budget, and overall aesthetic.
In this article, we’ll explore the key differences between saddle-stitched and perfect-bound catalogs, helping you determine which option is best for your specific needs.
Saddle-Stitched Catalogs: What Are They?

Saddle-stitched catalogs are bound using staples (or stitches) along the spine. The sheets are folded in half, and then stapled along the fold, which creates a simple yet effective binding. This method is ideal for catalogs with fewer pages and is both cost-effective and fast to produce.
Key Features of Saddle-Stitched Catalogs:
-
Page Count: Best suited for catalogs with a lower page count, typically ranging from 8 to 64 pages. Beyond this range, the catalog may not lay flat or close properly.
-
Binding Style: Two staples (sometimes more) are inserted into the spine of the catalog, holding the folded sheets together.
-
Affordability: Saddle stitching is one of the most affordable binding methods, making it ideal for smaller projects or those on a budget.
-
Durability: While not as durable as perfect binding, saddle stitching is sufficient for short-term use, especially for marketing materials or event programs.
Advantages of Saddle-Stitched Catalogs:
-
Cost-Effective: Since this method uses minimal materials and is relatively simple to execute, it’s a budget-friendly option for smaller catalogs.
-
Quick Turnaround: The production time for saddle-stitched catalogs is faster compared to more complex binding methods, making it great for projects with tight deadlines.
-
Flat Layout: Saddle-stitched catalogs can lay flat when opened, making them easy to read and handle.
Ideal Uses for Saddle-Stitched Catalogs:
Perfect-Bound Catalogs: What Are They?

Perfect-bound catalogs use a more advanced binding method that involves gluing the pages together along a square spine. The pages are trimmed to ensure uniformity, giving the catalog a professional, polished appearance similar to a paperback book. Perfect binding is often used for catalogs with a higher page count or when a premium look is desired.
Key Features of Perfect-Bound Catalogs:
-
Page Count: Perfect binding is ideal for catalogs with 40 pages or more, but it’s commonly used for much larger catalogs, sometimes containing hundreds of pages.
-
Binding Style: The pages are glued together along the spine and trimmed, creating a flat, clean edge.
-
Durability: Perfect-bound catalogs are more durable than saddle-stitched options, especially for long-term use or heavy handling.
-
Professional Look: The square spine gives perfect-bound catalogs a high-end, professional appearance, making them suitable for luxury products, annual reports, or corporate brochures.
Advantages of Perfect-Bound Catalogs:
-
Durability: The adhesive used in perfect binding creates a strong, long-lasting catalog that can withstand regular use.
-
Premium Appearance: Perfect-bound catalogs have a more refined look, which is ideal for businesses looking to impress clients or customers.
-
Large Page Capacity: Unlike saddle-stitching, perfect binding can accommodate hundreds of pages, making it the go-to option for thick, content-heavy catalogs.
Ideal Uses for Perfect-Bound Catalogs:
-
Product catalogs for large inventories
Choosing Between Saddle-Stitched and Perfect-Bound Catalogs
When deciding between saddle-stitched and perfect-bound catalogs, consider the following factors:
-
Page Count: If your catalog is less than 64 pages, saddle stitching is a great option. For thicker catalogs, perfect binding is the better choice.
-
Budget: Saddle-stitched catalogs are more affordable, so if cost is a major factor, this option may be preferable. However, for premium, high-end catalogs, perfect binding offers a more professional appearance, even if it comes at a higher cost.
-
Purpose: If your catalog is intended for short-term use, such as an event program, saddle stitching is sufficient. For catalogs that need to stand up to frequent use, like a product catalog or portfolio, perfect binding provides the durability you need.
Conclusion
Both saddle-stitched and perfect-bound catalogs offer unique advantages, and the right choice depends on your specific project needs. Saddle stitching is affordable, quick, and ideal for smaller catalogs, while perfect binding provides a professional, long-lasting solution for larger projects. By understanding the differences between these two binding methods, you can choose the best option to showcase your products or services effectively.
Brochures are a powerful marketing tool that can help your business effectively communicate its message, showcase products, and engage potential customers. In this comprehensive guide, we’ll walk you through everything you need to know about buying the perfect brochure from a print shop. Whether you’re a small business owner, a marketing professional, or a non-profit organization, this guide will help you make informed decisions to create impactful brochures.
Understanding Brochure Types
Bi-Fold Brochures
Structure: A bi-fold brochure consists of a single sheet of paper folded in half, creating four panels (two on the front and two on the back).
Uses:
- Corporate Brochures: Present company overviews, services, and contact information.
- Product Guides: Highlight key features and benefits of products with a clean, straightforward layout.
- Event Programs: Provide a schedule of events, speaker bios, and venue information
Benefits:
- Simplicity: Easy to design and read, making it suitable for straightforward presentations.
- Professional Appearance: Gives a polished and organized look.
- Cost-Effective: Generally cheaper to print than more complex folds.
Tri-Fold Brochures
Structure: A tri-fold brochure is created by folding a single sheet of paper twice, resulting in six panels (three on the front and three on the back).
Uses:
- Service Descriptions: Detail multiple services or features, with each panel dedicated to a specific aspect.
- Menus: Perfect for restaurants, listing appetizers, entrees, desserts, and beverages.
- Travel Brochures: Highlight destinations, attractions, and itineraries.
Benefits:
- Versatility: The six panels offer ample space for organizing content into sections.
- Compact: Folds neatly into a standard size, making it easy to distribute and carry.
- Engaging Design: Provides a dynamic layout that guides the reader through the content.
Z-Fold Brochures
Structure: A Z-fold brochure, also known as an accordion fold, consists of a single sheet of paper folded in a zigzag pattern, resulting in six panels (three on the front and three on the back).
Uses:
- Step-by-Step Guides: Ideal for tutorials or instructions that need to follow a sequence.
- Event Maps: Useful for large events, offering a map and schedule on different panels.
- Promotional Handouts: Great for eye-catching promotional materials with multiple points of interest
Benefits:
- Easy Navigation: The zigzag fold makes it easy to flip through the panels, ideal for step-by-step content.
- Distinctive Design: Stands out due to its unique folding pattern.
- Flexible Layout: Can be used for various purposes, from detailed guides to quick references.
Gate Fold Brochures
Structure: A gate fold brochure features two end panels that fold inward to meet in the center, with a larger center panel that unfolds to reveal the main content.
Uses:
- High-End Presentations: Perfect for luxury products or services, giving a sense of exclusivity.
- Invitations: Suitable for events where a dramatic reveal is desired.
- Special Promotions: Ideal for showcasing a featured product or offer with a central highlight.
Benefits:
- High Impact: The unfolding action creates a memorable experience for the reader.
- Central Focus: The central panel can be used to highlight key information or images.
- Elegant Design: Often used for high-end or premium marketing materials.
Accordion Fold Brochures
Structure: Similar to the Z-fold, but with more panels, an accordion fold brochure consists of multiple panels that fold in a zigzag pattern.
Uses:
- Detailed Guides: Ideal for manuals or extensive guides that require multiple sections.
- Travel Itineraries: Perfect for travel companies to outline comprehensive trip plans.
- Event Schedules: Useful for conferences or festivals with multiple activities and locations.
Benefits:
- Extended Content: Provides more space for detailed information compared to other folds.
- Organized Layout: Each panel can represent a different section or topic, making it easy to follow.
- Durability: The multiple folds make it sturdy and less likely to get damaged.
Custom Fold Brochures
Structure: Custom fold brochures are tailored to specific design and functional needs, allowing for unique and creative layouts.
Uses:
- Innovative Marketing: Perfect for brands looking to stand out with unique presentations.
- Interactive Designs: Can include pop-ups, die-cuts, and other interactive elements.
- Special Projects: Ideal for bespoke projects that require a non-standard approach.
Benefits:
- Unique Appeal: Custom folds can make your brochure stand out from the competition.
- Tailored Functionality: Designed specifically to fit your content and marketing objectives.
- Memorable: Creates a lasting impression with a distinctive format.
Choosing the Right Brochure Size: A Detailed Guide
Selecting the appropriate size for your brochure is crucial for effectively conveying your message and fitting the content you plan to include. The size of your brochure can impact its overall design, readability, and the impression it makes on your audience. Here’s a detailed look at the standard brochure sizes and considerations for choosing the right one for your needs.
Standard Brochure Sizes
8.5″ x 11″ (Letter Size)
Description: This is the most common brochure size and is typically used for tri-fold brochures.
Uses:
- Corporate Brochures: Provides ample space for detailed company information, services, and product descriptions.
- Event Brochures: Ideal for outlining event schedules, speaker bios, and venue maps.
- Product Catalogs: Can showcase multiple products with images and descriptions on each panel.
8.5″ x 14″ (Legal Size)
Description: Slightly larger than the letter size, this format offers more space for content.
Uses:
- Detailed Guides: Suitable for instruction manuals, extensive product guides, and educational material.
- Restaurant Menus: Offers more room to list menu items, specials, and promotions.
- Real Estate Brochures: Perfect for showcasing properties with detailed descriptions and high-quality images.
11″ x 17″ (Tabloid Size)
Description: This larger format is often used for bi-fold or larger multi-panel brochures.
Uses:
- Event Programs: Ideal for large events like conferences, festivals, and exhibitions with multiple sessions and activities.
- Promotional Brochures: Excellent for impactful marketing materials that require large images and extensive information.
- Maps and Travel Guides: Provides ample space for maps, travel tips, and destination highlights.
Custom Brochure Sizes
While standard sizes are widely used, custom sizes can be tailored to specific needs and design preferences. Custom sizes are particularly useful when you want your brochure to stand out or fit unique content requirements. Here are a few examples:
- Square Brochures: Unique and eye-catching, perfect for high-end products or creative industries.
- Mini Brochures: Compact and portable, ideal for quick reference guides or pocket-sized maps.
- Large Format Brochures: For impactful presentations and detailed project proposals.
Considerations for Choosing the Right Brochure Size
- Content Volume:
- High Content Volume: Choose larger sizes like 8.5″ x 14″ or 11″ x 17″ to ensure your information is not cramped.
- Low Content Volume: Smaller sizes like 8.5″ x 11″ or custom mini brochures can effectively convey concise messages.
- Purpose and Use:
- Informational: For detailed guides or manuals, opt for larger sizes to provide enough space for text and images.
- Promotional: If the brochure is meant to grab attention at events or as a direct mail piece, a standard 8.5″ x 11″ or a custom size can be very effective.
- Convenience: Consider how the brochure will be used and carried by the audience. Smaller brochures are more portable and easy to hand out.
- Design Aesthetics:
- Visual Impact: Larger sizes allow for more creative freedom with design elements, making a strong visual impact.
- Readability: Ensure the text is legible and not overcrowded. Choose a size that provides a comfortable reading experience.
- Printing Costs:
- Budget: Larger brochures tend to be more expensive to print. Balance your budget with the need for space and impact.
- Quantity: Higher print quantities can reduce the per-unit cost, even for larger sizes.
- Distribution Method:
- Mailing: If you plan to mail the brochures, consider the standard postal sizes to avoid extra mailing costs.
- In-Person Distribution: Larger brochures can be more impactful for in-person events, while smaller ones are easier to carry and distribute.
Selecting the Perfect Paper Type
Picking the Perfect Paper Type for Your Brochure
Choosing the right paper type for your brochure is crucial for creating a professional, impactful piece that effectively communicates your message. The paper type affects the look, feel, and durability of your brochure, so it’s important to select one that aligns with your goals and audience. Here’s a detailed guide to help you pick the perfect paper type for your brochure.
Types of Paper Finishes
- Glossy Paper
- Matte Paper
- Uncoated Paper
Glossy Paper
Finish: Shiny and smooth, providing a reflective surface that enhances color vibrancy.
Benefits:
- Vibrant Colors: Glossy paper makes colors pop, which is great for brochures with a lot of images or colorful graphics.
- Professional Appearance: Gives a polished and high-quality look that grabs attention.
- Durability: Resistant to dirt and fingerprints, keeping your brochure looking clean and new.
Uses:
- Product Catalogs: Ideal for showcasing products with high-quality images to highlight details and colors.
- Event Promotions: Perfect for eye-catching flyers and event brochures that need to stand out.
- Travel Brochures: Great for displaying scenic images and vibrant destinations.
Matte Paper
Finish: Smooth but non-reflective, offering a more subdued and elegant look.
Benefits:
- Professional Look: Provides a sophisticated, high-end appearance that’s easy on the eyes.
- Readability: The non-glossy finish makes text easier to read, reducing glare and reflections.
- Fingerprints: Less prone to showing fingerprints and smudges, keeping your brochure looking pristine.
Uses:
- Corporate Brochures: Ideal for business presentations, company profiles, and professional services.
- Educational Materials: Perfect for guides, manuals, and informational brochures that prioritize readability.
- Menus: Excellent for restaurant menus where readability and a professional look are essential.
Uncoated Paper
Finish: Natural texture with no coating, giving a more tactile feel.
Benefits:
- Writable: Easy to write on, making it ideal for forms, note-taking, or personalized messages.
- Natural Look: Provides a classic and organic feel that can be more approachable and friendly.
- Cost-Effective: Typically cheaper than coated papers, making it a budget-friendly option.
Uses:
- Forms and Applications: Perfect for brochures that require the recipient to fill out information.
- Educational Handouts: Great for informational pamphlets, study guides, and manuals.
- Community Flyers: Ideal for local events, announcements, and other community-related materials.
Paper Weight Considerations
The weight of the paper, measured in GSM (grams per square meter), affects the durability and feel of your brochure. Here are some common paper weights and their best uses:
- 80-100 GSM: Lightweight paper, similar to standard printer paper. Best for informational flyers, bulk mailings, and handouts.
- 120-170 GSM: Mid-weight paper, offering a balance between durability and flexibility. Ideal for standard brochures, product guides, and event programs.
- 200-250 GSM: Heavyweight paper, providing a sturdy and premium feel. Perfect for high-end brochures, product catalogs, and important presentations.
- 300+ GSM: Cardstock, very thick and durable. Suitable for covers, special invitations, and premium promotional materials.
Specialty Paper Options
- Recycled Paper
- Textured Paper
- Laminated Paper
Recycled Paper
Description: Made from recycled materials, offering an eco-friendly option.
Benefits:
- Eco-Friendly: Reduces environmental impact, appealing to environmentally conscious consumers.
- Natural Texture: Often has a unique, slightly rough texture that adds character.
Uses:
- Eco-Conscious Brands: Perfect for companies that want to highlight their commitment to sustainability.
- Community Events: Great for brochures promoting environmental initiatives or local events.
Textured Paper
Description: Features a distinctive texture, such as linen, laid, or felt, adding a tactile element.
Benefits:
- Unique Feel: Provides a tactile experience that can make your brochure stand out.
- High-End Appearance: Adds an element of luxury and sophistication.
Uses:
- Luxury Products: Ideal for high-end product brochures, luxury services, and premium invitations.
- Creative Industries: Perfect for art galleries, design studios, and creative businesses.
Laminated Paper
Description: Coated with a thin plastic layer, adding extra durability and a glossy or matte finish.
Benefits:
- Durability: Resistant to water, tearing, and general wear and tear, making it long-lasting.
- Enhanced Finish: Available in both glossy and matte finishes, enhancing the appearance and feel.
Uses:
- Menus: Ideal for restaurant menus that need to withstand frequent handling.
- Outdoor Brochures: Perfect for brochures that will be used outdoors or in environments where they may get wet.
Understanding Printing Techniques: A Detailed Guide
Choosing the right printing technique is crucial for ensuring the quality and effectiveness of your brochures. Different techniques offer varying levels of detail, color fidelity, and cost-effectiveness, which can significantly impact the final product. Here’s an in-depth look at the main printing techniques and their best uses.
Digital Printing
Process: Digital printing involves creating an image or document on a computer and sending it directly to the printer. This method uses laser or inkjet printers, which apply toner or ink to the paper.
Benefits:
- Quick Turnaround: Digital printing is faster than traditional methods, making it ideal for tight deadlines.
- Cost-Effective for Small Runs: Best suited for smaller quantities, as it doesn’t require setup costs associated with plates.
- Variable Data Printing: Allows for easy customization of each printed piece, perfect for personalized marketing.
Best For:
- Short Runs: Ideal for projects requiring fewer copies, typically under 1,000 units.
- Personalized Materials: Great for direct mail campaigns where each brochure needs to be customized.
- Prototyping: Useful for creating samples and proofs before committing to larger runs.
Offset Printing
Process: Offset printing involves transferring an image from a plate to a rubber blanket, then onto the paper. This indirect method ensures high-quality prints with consistent results.
Benefits:
- High Quality: Produces sharp, clean images with accurate color reproduction.
- Cost-Effective for Large Runs: The initial setup costs are higher, but the per-unit cost decreases significantly with larger quantities.
- Versatile: Can print on a wide range of paper types and sizes.
Best For:
- Large Runs: Economical for high-volume printing, typically over 1,000 units.
- High-Quality Prints: Ideal for projects where quality is paramount, such as luxury brochures and detailed images.
- Consistent Results: Ensures uniformity and consistency across all printed materials.
Letterpress Printing
Process: Letterpress printing involves pressing inked plates or type onto paper, creating an indented impression. This traditional method offers a tactile and distinctive finish.
Benefits:
- Unique Texture: Creates a debossed effect, adding a tactile element to the design.
- High-Quality Feel: Conveys a sense of craftsmanship and luxury.
- Durability: The thick, textured paper often used is durable and long-lasting.
Best For:
- High-End Invitations: Perfect for wedding invitations, luxury event brochures, and bespoke announcements.
- Special Editions: Suitable for limited edition prints and collectible items.
- Branding Materials: Great for business cards and stationery where a premium look is desired.
Screen Printing
Process: Screen printing involves pushing ink through a stencil (or screen) onto the paper. Each color requires a separate screen, making it a multi-step process.
Benefits:
- Vibrant Colors: Produces bold, opaque colors that stand out.
- Versatile Substrates: Can print on a variety of materials, including paper, fabric, and plastic.
- Durable Prints: The thick ink layers are long-lasting and resistant to fading.
Best For:
- Posters and Art Prints: Ideal for artwork and promotional posters with bright, vivid colors.
- Specialty Brochures: Perfect for brochures on unconventional materials or with unique finishes.
- Branded Merchandise: Great for printing on items like t-shirts, tote bags, and other promotional products.
Flexography
Process: Flexography uses flexible relief plates to print on a variety of substrates. It’s similar to letterpress but uses a rotary printing process.
Benefits:
- High-Speed Printing: Capable of rapid production, suitable for large runs.
- Wide Range of Substrates: Can print on materials like plastic, metallic films, cellophane, and paper.
- Efficient for Packaging: Often used for printing on packaging materials and labels.
Best For:
- Packaging Brochures: Ideal for brochures that will be used as inserts in packaging.
- Labels and Tags: Great for product labels, tags, and other packaging elements.
- Large Runs: Cost-effective for high-volume production runs.
Gravure Printing
Process: Gravure printing involves etching the image onto a cylinder, which is then used to transfer ink onto the paper. This technique is known for its high-quality reproduction of images.
Benefits:
- Excellent Image Quality: Produces high-resolution images with rich color depth.
- Durability: The engraved cylinders are durable and can be used for long print runs.
- High-Speed Production: Suitable for large-scale printing with consistent quality
Best For:
- High-End Catalogs: Ideal for detailed product catalogs and brochures with high-quality images.
- Magazines and Publications: Perfect for high-volume magazines, inserts, and similar materials.
- Luxury Marketing Materials: Suitable for premium brochures where image quality is crucial.
Digital vs. Offset Printing: A Comparison
Digital Printing:
- Setup Time: Minimal, fast turnaround.
- Cost: Lower initial cost, higher per-unit cost for large runs.
- Flexibility: Easy to customize and print on demand.
- Quality: Excellent for small to medium runs but may not match offset for large-scale projects.
Offset Printing:
- Setup Time: Longer due to plate preparation.
- Cost: Higher initial cost, lower per-unit cost for large runs.
- Flexibility: Less suited for variable data printing.
- Quality: Superior for large runs with consistent, high-quality results.
Design Tips for Impactful Brochures
- Clear Message: Ensure the content is concise and communicates the main points effectively.
- Visual Hierarchy: Use headings, subheadings, and bullet points to guide the reader’s eye.
- High-Quality Images: Use sharp, high-resolution images to maintain professionalism.
- Consistent Branding: Match the brochure design with your brand’s colors, fonts, and overall style.
- Call to Action: Include a clear call to action to direct the reader on what to do next.
Essential Printing Tips
- Proofreading: Double-check all text for errors before printing.
- Bleed Area: Include a bleed area in your design to avoid white edges.
- Paper Weight: Choose a suitable paper weight (measured in GSM – grams per square meter) depending on the brochure’s purpose.
- Color Mode: Design in CMYK color mode, as it’s used for printing.
Effective Distribution Methods
- Direct Mail: Sending brochures directly to potential customers.
- In-Store: Displaying brochures in stores or offices.
- Events: Handing out brochures at trade shows, conferences, or other events.
- Partnerships: Distributing through partnerships with other businesses.
Cost Factors to Consider
- Quantity: Higher quantities typically reduce the cost per unit.
- Paper Type and Weight: Premium papers are more expensive.
- Finishing Options: Adding gloss, matte lamination, or UV coating increases costs.
- Design Complexity: More complex designs may incur additional design costs.
Environmental Considerations
- Recycled Paper: Using recycled paper for eco-friendly printing.
- Soy-Based Inks: Opting for soy-based inks, which are less harmful to the environment.
- Green Printing Companies: Choosing printers with sustainable practices.
Conclusion
Choosing the right brochure for your business involves understanding various types, sizes, paper choices, and printing techniques. By following this guide, you can create brochures that effectively communicate your message and engage your target audience. Whether you need a simple bi-fold brochure or a detailed accordion fold, the right choices will help your business stand out and make a lasting impression.
For high-quality brochure printing, contact Unique Print NYC and take your marketing materials to the next level!
This blog post is brought to you by Unique Print NYC, your trusted partner in creating stunning brochures and other print materials. Visit our website to learn more about our services and get a quote today.
With the world becoming increasingly digitized it may seem a little “old-school” to use business cards today. While smartphones and digital networking may increasingly dominate business interactions, business cards can still be a powerful tool in business networking in an increasingly paper-less world. You’ll still often find them in stores sitting on the counter – a testament to their staying power and usefulness.
Reasons why business cards are still relevant today
1. Tangible connection: Tangibility still has a profound psychological impact on people today. That’s what actual paper books are still selling today and why people records are still one of the most consistent mediums for buying music. When you hand someone a physical object it has tangibility and creates a more memorable impact and connection. Not only that, when they find your business card later, it will remind them of the interaction you had when you gave it to them.
2. Branding Opportunity: Business cards can be completely customizable and tailor-made to fit your brand’s voice and style. In the same way your social media profiles can project a different tone, mood, or style, business cards can fit into the same branding effort and create a cohesive visual identity that not only exists online but in the real world too. Consider all of these different ways business cards can be created to fit your brand.
3. Bridging the gap between physical and digital: While certain smartphones and apps can make it easy to share contact information, not everyone uses the same platforms or apps and not everyone will have their business information versus their personal information readily exchangeable. You can bridge that gap by including a QR code on one side of your business card to readily direct people to your website, your contact information, an advertisement, or any online link you choose.
3. It’s quicker: Nothing is easier than handing a person a physical card. It requires less effort than pulling out a smartphone or typing in an address and engages the receiver.
4. Lasting Impressions: With a unique design, a memorable exchange, or a clever placement, a business card can leave people with a lasting impression of the interaction they had with you or the product or company they can associate that card with.
Choosing a business card
A business card doesn’t have to be the stereotypical plain white card with black text – in fact we almost recommend NOT going that route unless it fits your brand profile. Business cards can be customizable in several different ways you may not have even considered! Consider all of the different options you have in creating a business card.
Different options for business cards
1. Card Size:
- Standard: Typically 3.5 x 2 inches.
- Square: Various dimensions, such as 2.5 x 2.5 inches.
- Mini: Smaller than standard, often around 3.5 x 1.75 inches.
- Custom: Any size you prefer, tailored to your design needs.
2. Paper Type:
- Matte: Smooth, non-glossy finish; good for a professional look.
- Glossy: Shiny finish that enhances colors and graphics.
- Textured: Includes options like linen or laid for a tactile feel.
- Recycled: Eco-friendly option made from recycled materials.
- Premium Stock: Higher quality, thicker paper for a luxurious feel.
3. Card Thickness:
- Standard: Usually around 14-16 pt thickness.
- Extra-thick: Can go up to 32 pt or more for a sturdier card.
4. Finish:
- Matte: Non-reflective and smooth.
- Glossy: Shiny and reflective.
- UV Coating: Adds a protective, high-gloss layer.
- Spot UV: Glossy highlights on specific areas of the card.
5. Design:
- Custom Design: Created by a graphic designer to match your brand.
- Templates: Pre-designed layouts you can customize with your information.
- DIY Design Tools: Online tools that let you design your card from scratch.
6. Color:
- Full-color: Vibrant and detailed printing.
- Black and White: Classic and professional.
- Spot Color: Uses one or two colors for a specific effect.
7. Orientation:
- Landscape: Wider than tall, typical for most business cards.
- Portrait: Taller than wide, can stand out visually.
8. Special Features:
- Rounded Corners: Softer edges that can make the card feel unique.
- Embossing: Raised text or graphics for a 3D effect.
- Foil Stamping: Metallic foil applied to certain areas for a shiny effect.
- QR Codes: Scannable codes that link to your website or digital portfolio.
9. Quantity:
- Small Batch: Fewer cards, suitable for startups or events.
- Bulk Orders: Larger quantities, often more cost-effective per card.
10. Budget:
- Cost per Card: Depends on material, finish, and additional features.
- Total Budget: Consider the overall cost based on the number of cards and your design choices.
These choices allow you to customize your business cards to reflect your brand’s identity and meet your specific needs. With all of these different options the opportunities to create something unique to you and your business and make a real statement are endless.
What should my business cards have on them?
With so many different options to choose from for how to design your cards, don’t forget to think about the content that’s on the card themselves.
Essential Information:
1. Name: Your full name, typically in a larger or bold font.
2. Job Title: Your position or role within the company.
3. Company Name: The name of your business or organization.
4. Contact Information:
- Phone Number: Include a direct line or main office number.
- Email Address: Use a professional email address, ideally linked to your company domain.
5. Website: Your business’s website URL.
Additional Content Ideas:
1. Social Media Handles: Include relevant professional social media profiles (e.g., LinkedIn, Twitter).
2. Address: Physical location of your business, if relevant to your industry.
3. Logo: Incorporate your company logo for brand recognition.
4. Tagline or Slogan: A brief phrase that encapsulates your business’s mission or value proposition.
5. QR Code: A scannable code that leads to your website, portfolio, or digital business card.
6. Certifications or Qualifications: Highlight any relevant professional certifications or qualifications.
7. Company Motto or Mission Statement: A brief statement that reflects your business’s core values.
8. Photo: Your professional headshot, useful in networking to help contacts remember you.
Design Considerations:
1. Layout: Ensure the layout is clean and organized, with a clear hierarchy of information.
2. Font Choice:Use professional, easy-to-read fonts and maintain consistency with your brand’s typography.
3. Color Scheme: Reflect your brand’s colors to enhance brand recognition.
4. Material and Finish: Choose between matte, glossy, textured, or recycled materials based on the impression you want to make.
Tips for Effective Business Cards:
1. Simplicity: Keep the design simple and avoid clutter. Too much information can overwhelm the recipient. Remember: the goal of the business card is to convey the crucial information you want.
2. Readability: Ensure all text is legible, with sufficient contrast between text and background.
3. Balance: Balance visual elements and text to create an aesthetically pleasing card.
4. Proofread: Carefully proofread all content to avoid any mistakes or outdated information.
5. Consistent Branding: Align the business card design with your overall branding strategy to maintain a cohesive look across all marketing materials.
Examples of Creative Elements:
1. Interactive Elements: Consider adding elements like augmented reality (AR) codes that can bring the card to life when scanned.
2. Unique Shapes: Opt for non-traditional shapes or die-cuts to make your card stand out. Just don’t overdo it! You don’t want inconvenience your new contact and create a negative impression from being too over the top.
3. Textures: Use embossing, debossing, or spot UV to create a tactile experience.
If you’re overwhelmed by all of the choices and considerations above, remember you can always hire a graphic designer or consult with us about the best and most appropriate choices for your business. Make creating a business card a fun and creative process!
Conclusion
While digital networking continues to grow, business cards retain their unique value in the professional world. They offer a tangible, professional, and versatile way to make connections, reinforce your brand, and facilitate follow-ups. Embracing both digital and traditional networking methods ensures you are prepared for any professional encounter. You can start to create your unique business cards here or consult with us to discover a design that fits your brand voice.
We don’t have to tell you first impressions are super important in life and in business. Even though business has become much more digital with online meetings more prevalent now than ever, our customers continue to come to us with questions and projects for business cards! It still remains an indispensable tool for networking and brand representation.
So, we decided to make this guide where we provide insights into business card sizing, dimensions, and printing options.
Standard Business Card Sizing and Dimensions

- Dimension: 3.5 x 2 inches
- Orientation: Horizontal or vertical
The ubiquitous 3.5 x 2 inches business card size offers a classic and versatile canvas. We recommend this size for its compatibility with cardholders and wallets, ensuring your information is always within arm’s reach.
European Business Card Dimensions
- Dimensions: 3.346 x 2.165 inches
- Orientation: Slightly taller than the standard
For those who may need to appeal to a European audience or simply want to employ a more European style, these subtle dimension distinctions can leave a great first impression.
Non-Standard Business Card Sizes
While standard sizes provide a safe bet, sometimes breaking away from the norm can set you apart. Here are a couple of popular, non-standard dimensions that can make a bold statement.
Square Business Cards

- Dimensions: 2.5 x 2.5 inches
- Impact: Unique and visually striking
Square business cards defy convention, making them memorable and visually appealing.
Mini Business Cards
- Dimensions: 3 x 1 inches
- Function: Concise and attention-grabbing
For those who believe less is more, mini business cards offer a compact yet impactful way to share information.
Printing Techniques
Choosing the right printing technique can elevate your business cards from ordinary to extraordinary. Keep this in mind for the next time you’re in need of business cards.
Offset Printing
- Quality: High-resolution and professional
- Cost: Economical for large quantitie
Digital Printing
- Flexibility: Ideal for small batches and quick turnaround
- Versatility: Supports intricate designs and variable data printing
The next time you work with a print shop for business cards, keep this short list handy so that you can come to the table with some ideas. The more you have an idea of what you want, you’ll enable the print shop that much more to bring your vision to life aligned to your budget.
Coatings and Finishes
The final touches can make or break the impact of your business card. Consider the following finishes and what each provides.
Matte Finish
- Elegance: Subtle and sophisticated
- Durability: Resistant to scratches and scuffs
Glossy Finish
- Vibrancy: Enhances colors and visuals
- Attention-Grabbing: Reflects light for a polished look
Understanding these finishes allows you to tailor your business cards to convey the desired image for your brand.
A Chance for Unique Print NY to Make Its First Impression
Whether you’re just thinking about business cards or are ready to design and print, feel free to contact us for a consultation.
We pride ourselves in our problem-solving abilities, fast turnarounds, and high quality printing services. We’d like the opportunity to make our first impression with you!
Running a business in New York can be hard and confusing. Why is tax filing earlier for businesses vs. personal taxes? What kind of marketing should I be doing to attract more customers? How do I keep a competitive edge as more businesses come into my neighborhood?
We wish we can give you all the answers to your business but the one thing we certainly can do is simplify which type of digital print to choose for your marketing collateral.
Whether you’re a startup in Brooklyn, a corporate giant in Manhattan, or a local business in Queens, here’s a simple guide into the differences between pamphlets vs. brochures vs. flyers vs. leaflets.
That way you can focus on the other essential things to run your business.
If you need some inspiration, check out these digital prints we did for our customers.
Pamphlets
A common denominator between all successful NYC businesses seems to be their abilities to storytell. Whether it’s about a business’s mission or an upcoming product release, pamphlets serve as a great medium to communicate stories.
Pamphlets provide a succinct and catchy medium as they’re usually printed as single-sheet documents with a key message on each sheet. With dimensions usually around 8.5 x 11 inches or 5.5 x 8.5 inches, it gives enough space for some storytelling but not too much for your audience to have to read through.
Brochures
Brochures are perfect for when you need to present detailed information accompanied by beautiful imagery. Think about what your company offers and if you need to present it in a visually appealing way, definitely consider using brochures.
The standard dimensions for brochure ranges from 8.5 x 11 inches to 11 x 17 inches, providing ample space for engaging content and captivating imagery.
Flyers
According to some studies, did you know humans have a shorter attention span than goldfish? This can make it a real challenge for your business to tell its story or promote its products.
We’re not saying that the type of digital print will solve this challenge. However, choosing the right type of print certainly won’t hurt.
You could have guessed it, but flyers will be your digital print of choice when you need something to grab attention quickly and convey information to your audience without overwhelming them. Flyers come in various dimensions but a standard size is 8.5 x 11 inches or 4 x 6 inches.
Similar to flyers, leaflets could also be a good choice. But bear in mind that leaflets are usually double-sided prints and contain a bit more information than flyers.
How Unique Print NY Can Help
As a NYC business, we know how important it is to effectively speak to your audience. Bookmark this page for the next time you need a simple guide to choosing the right digital print for your marketing collateral.
Remember, the effectiveness of your marketing also comes down to the design and through it, showcasing your understanding of your target audience.
We’re here to help you navigate the design and production of your digital prints so that your audience clearly understands your story.
Types of Booklet Binding Options for Your NYC Business
If you have a business or work in NYC, you’re well aware that creating visually appealing and professional booklets is crucial for leaving a lasting impression on your clients and customers. Whether you’re presenting proposals, marketing materials, or informational guides, choosing the right booklet binding option is essential to enhance the overall presentation and durability of your printed materials.
Well, as a print shop operating in NYC for over 40 years, we’re here to help you with this guide to choosing the best booklet binding option for you and your specific needs.
Understanding All Your Options
Perfect Binding
Perfect binding is an excellent option for those looking for something sleek yet professional. This method involves gluing the pages together at the spine, creating a clean and cohesive finish. Perfect binding is often chosen for thicker booklets and publications, giving a polished look that is commonly associated with high-end magazines and catalogs.
Wire-O Binding
Wire-O binding offers the perfect blend of style and functionality. This method involves double-loop wires threaded through punched holes along the spine. It provides a secure and sturdy binding, allowing the booklet to open flat and making it easy to handle. Wire-O binding is often favored for manuals, cookbooks, and other materials that require frequent reference.
Saddle Stitch Binding
Saddle stitching is a cost-effective binding method, perfect for booklets with a lower page count. This technique involves folding sheets in half and stapling them along the spine. Its simplicity and cost efficiency make it an attractive option for marketing materials, brochures, or event programs.
Coil Binding
When it comes to durability, coil binding really stands out. This method involves threading a plastic or metal coil through evenly spaced holes along the edge of the document. The result is a booklet that lays completely flat and allows for 360-degree rotation—ideal for manuals, training materials, or reference guides.
Tape Binding
Tape binding could be the option for you if you’re looking for something very secure, yet still looks professional. This method involves applying a strip of cloth or paper tape along the spine, providing a clean and cohesive finish. It offers the look of a traditional book, making it an excellent choice for reports, presentations, or proposals.
Binding Advantages List
We know that all of this can be a lot to remember. Of course, you can always contact us for an expert consultation on what kind of binding option might be best for your project.
However, we wanted to provide you with a short list of advantages for some of our more popular print binding options:
Perfect Binding
- Professional looking
- High-end aesthetics
- Bookstore-quality finish
- Versatile especially for higher page count booklets
Saddle Stitch Binding
- Affordable
- Lies flat
- Fast production
Wire-O Binding
- Professional looking
- Easy to flip
- Various color options
Coil Binding
- Opens flexibly
- Very durable
- Various color options
Other Factors to Consider
Your Booklet’s Purpose and Content
Before selecting a binding option, carefully consider the purpose and content of your booklet. If it’s a relatively low page count magazine, saddle stitch binding may be the most practical choice. For premium marketing materials, perfect binding can convey a sense of professionalism. Or, maybe you prioritize durability and a flat laying booklet, which wire-o binding would be very suitable.
There’s a custom element to every booklet so definitely ensure you communicate your full vision to your print shop. Their experts will give you the best option possible.
Budget
This is an obvious one and sometimes the most important. There’s a pretty wide range of options when it comes to pricing, eg. saddle stitch binding is usually more cost-effective than perfect binding. A print shop with the expertise will be able to consider your budget and minimize compromising on quality as much as possible.
Brand Image
This one requires you to think internally rather than the options that are available to you. Consider how you want your brand to be received by your audience. Then, communicate that vision to your print shop to ensure the binding and finishing best aligns to your desire. As an example, wire-o binding may be a good option for a brand that exudes a modern feel whereas perfecting binding will better align with a brand image that is more classic.
How Unique Print NY Can Help
As you might realize by now, choosing the best booklet binding option can be dizzying at times: so many available options, factors to consider, and custom requirements that your project requires.
At Unique Print NY, we pride ourselves in our problem-solving abilities, exceptional customer service, and high-quality print jobs. And so if you ever have a booklet binding project or even just a question, consider reaching out to us to speak with one of our experts.
In today’s digital age, printing machines continue to play a pivotal role in various industries. From graphic design to advertising and signage, these machines offer a wide range of capabilities to bring ideas to life. In this article, we will delve into the remarkable features and use cases of five prominent printing machines: the HP Latex365, HP DesignJet DreamColor Z6200, Laminator/Mount GFP 563TH, Laminator/Mount GFP 463TH, and Mimaki Vinyl Cutter CG 160 FX2. Let’s embark on a journey of discovery and unleash the potential of these powerful printing devices.
HP Latex365:
The HP Latex365 is a versatile printing machine renowned for its exceptional print quality and durability. Here are some notable use cases:
a) Large-Format Posters: Whether for indoor or outdoor applications, the Latex365 can produce vivid, high-resolution posters that captivate attention.
b) Banners and Signage: With its water-based latex inks, this machine is ideal for creating durable banners and signage that withstand the elements.
c) Vehicle Wraps: The Latex365’s ability to print on a wide range of materials makes it perfect for creating eye-catching vehicle wraps, ensuring vibrant and long-lasting graphics.
HP DesignJet DreamColor Z6200:
The HP DesignJet DreamColor Z6200 is a top-of-the-line printing machine that delivers impeccable color accuracy and consistency. Its use cases include:
a) Fine Art Reproductions: Artists and photographers can reproduce their artwork and photographs with exceptional precision and detail, thanks to the Z6200’s high-resolution printing capabilities.
b) CAD and GIS Drawings: Architects, engineers, and cartographers can rely on this machine to produce accurate and intricate CAD and GIS drawings, ensuring every line and detail is faithfully reproduced.
c) Proofing and Graphic Design: The Z6200’s color accuracy and consistency make it an excellent choice for graphic designers and print professionals who require precise color proofs and mock-ups.
Laminator/Mount GFP 563TH:
The Laminator/Mount GFP 563TH is a versatile device that combines laminating and mounting functionalities. Its use cases include:
a) Trade Show Graphics: This machine enables the lamination and mounting of large-format trade show graphics, ensuring durability, protection, and a professional finish.
b) Point-of-Sale Displays: Retailers can create attractive and durable point-of-sale displays by laminating and mounting their graphics, enhancing visual appeal and product promotion.
c) Wall Murals and Decals: With the GFP 563TH, large-scale wall murals and decals can be protected and enhanced, making them more resistant to wear and tear.
Laminator/Mount GFP 463TH:
Laminator/Mount GFP 463TH: The Laminator/Mount GFP 463TH is another versatile laminating and mounting machine. Its use cases include:
a) Posters and Prints: This device is well-suited for laminating and mounting posters, ensuring protection and enhancing their visual impact.
b) Educational Materials: Schools and educational institutions can laminate and mount teaching aids, charts, and diagrams, increasing their durability and usability.
c) Restaurant Menus: The GFP 463TH allows for the lamination and mounting of restaurant menus, making them water-resistant, easy to clean, and more visually appealing.
Mimaki Vinyl Cutter CG 160 FX2:
The Mimaki Vinyl Cutter CG 160 FX2 is a precision cutting machine tailored specifically for vinyl-based applications. Its use cases include:
a) Vinyl Decals and Stickers: From vehicle graphics to personalized laptop stickers, this cutter ensures precise and intricate cuts for stunning vinyl decals.
b) Heat Transfer